Border Cyber Group
Home
About
Sign in
Subscribe
25 Apr 2023
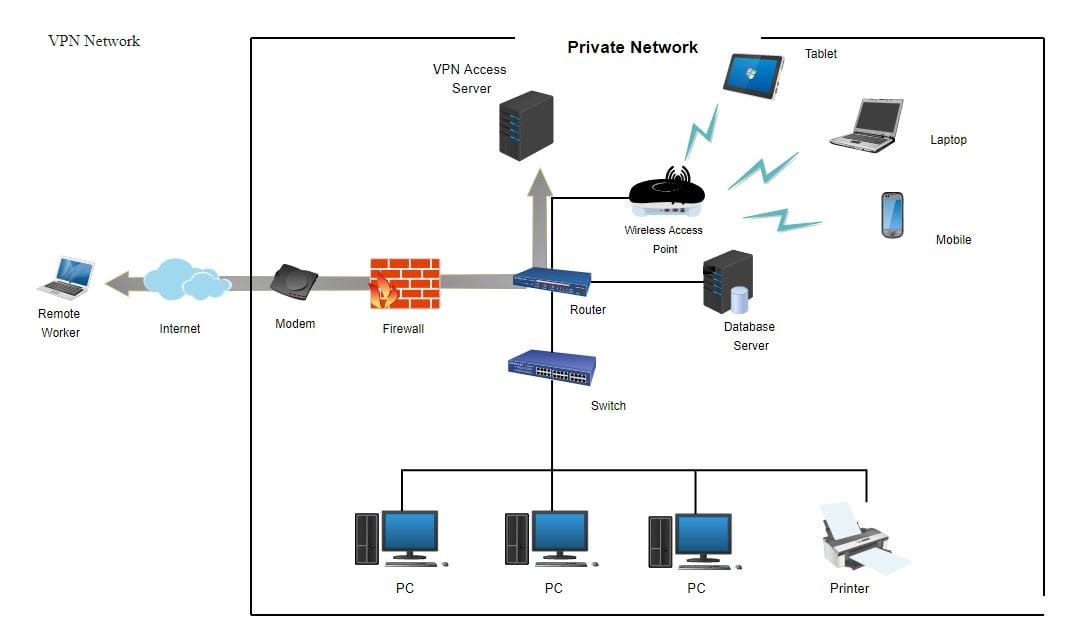
Secure VPN config on Debian/Ubuntu
Written by:
Jonathan Brown